
HOW TO PREPARE, CURE, AND PLACE DRIFTWOOD IN YOUR AQUARIUM
Many aquarists enjoy using driftwood in their tanks to create a natural and aesthetically pleasing environment. However, new driftwood tends to float, which can be frustrating. Here’s a comprehensive guide on how to prepare driftwood to sink and safely introduce it into your aquarium.
Why Does Driftwood Float?
Wood floats because it is less dense than water. Freshly collected or purchased driftwood often contains trapped air within its pores and fibers. It also contains tannins, which are organic compounds that can stain aquarium water a yellow or brown color. While tannins are generally harmless and some fish species even benefit from them, many aquarists prefer clear water.
Methods to Make Driftwood Sink
There are several effective methods to prepare driftwood for your aquarium.
1. Soaking (The Most Common Method)
Soaking is the most widely used and effective method, though it requires patience.
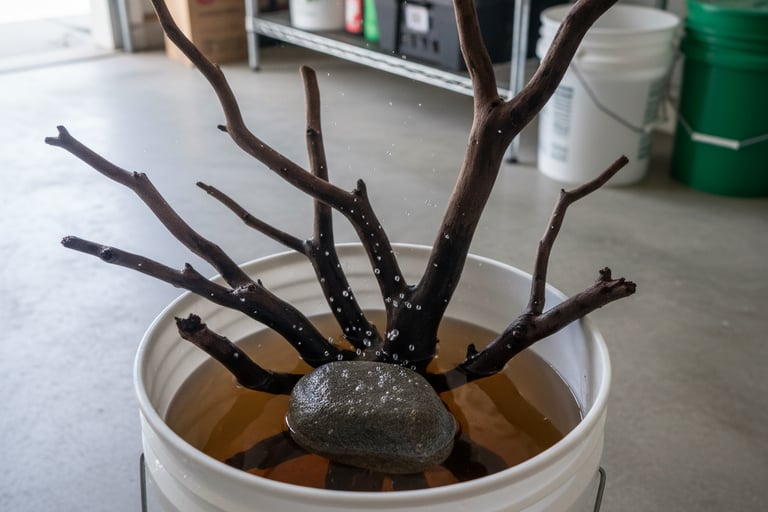
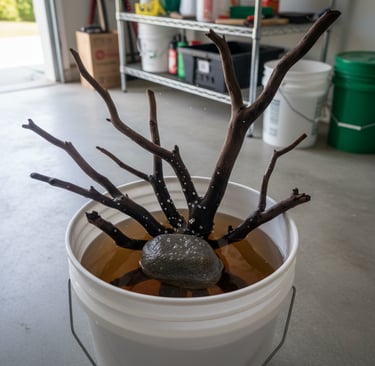
Process: Submerge the driftwood completely in a bucket or tub of water. You can use a heavy rock or object to keep it submerged.
Duration: This can take anywhere from a few days to several weeks, or even months for very dense pieces. Change the water every few days to help remove tannins.
Benefits: This method naturally waterlogs the wood, replacing air with water. It also leaches out a significant amount of tannins, reducing their impact on your aquarium water.
Indicator: The wood is ready when it sinks on its own without any assistance.
Here's an example of driftwood soaking in a bucket:
2. Boiling
Boiling accelerates the waterlogging process and offers additional benefits.
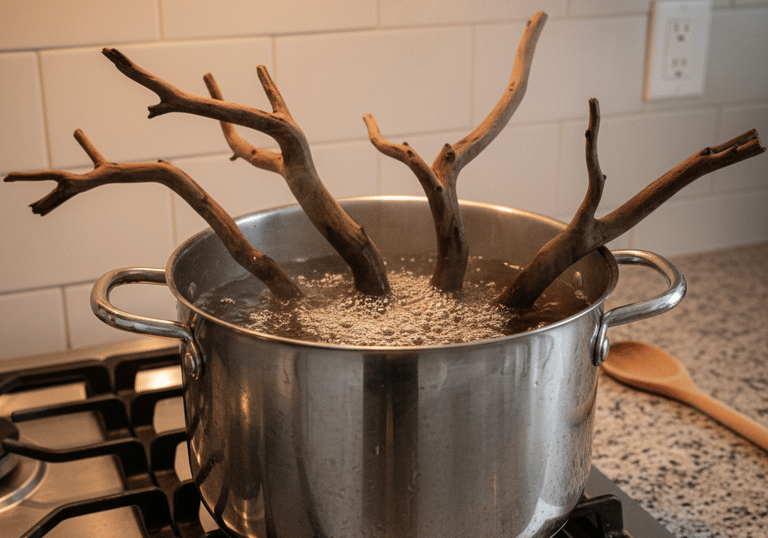
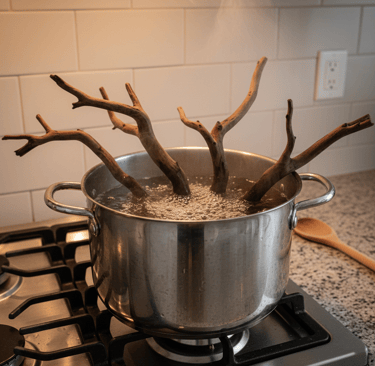
Process: Place the driftwood in a large pot and boil it. If the piece is too large, you can boil sections of it.
Duration: Boil for 1-2 hours, changing the water when it turns dark brown.
Benefits:
Faster Sinking: Boiling expels trapped air much faster than soaking.
Tannin Removal: It rapidly leaches out tannins, preventing significant discoloration of your tank water.
Sterilization: Boiling kills off any potential pests, fungi, bacteria, or algae that might be present on the wood, making it safer for your aquarium.
Caution: Ensure the wood is completely cool before placing it in the aquarium.
A piece of driftwood being boiled in a pot:
3. Weighing Down
If you're short on time or have particularly stubborn pieces of wood, you can use weights.
Process: Securely attach a piece of aquarium-safe slate, rock, or a lead plant weight to the bottom of the driftwood using fishing line, cable ties, or aquarium-safe glue.
Benefits: Allows you to place the driftwood in the tank immediately, even if it's not fully waterlogged.
Considerations: Over time, the wood will naturally waterlog, and you may be able to remove the weight. Choose weights that are inconspicuous or can be buried in the substrate.
Driftwood being weighed down by an aquarium-safe rock:
4. Curing (For Collected Driftwood)
If you've collected your own driftwood, an initial curing process is highly recommended before soaking or boiling.
Process: Remove all bark, soft spots, and debris. You can use a stiff brush and water. Let it dry completely in the sun for several weeks or months. This helps kill off any organic matter and makes the wood less prone to rot.
Benefits: Reduces the amount of organic material that could decay in your tank and prevents unwanted hitchhikers.
Collected driftwood being cleaned and prepared:
Important Considerations
Never use wood from unknown sources: Avoid wood that has been treated with chemicals, painted, or is soft and decaying.
Choose the right type of wood: Not all wood is suitable for aquariums. Hardwoods like Mopani, Manzanita, Cholla (for shrimp), and Malaysian driftwood are popular choices. Avoid softwoods like pine or cedar, as they can rot quickly and release harmful compounds.
Rinse thoroughly: After any treatment, give the driftwood a final rinse with clean, dechlorinated water before adding it to your tank.
Monitor your water parameters: Even after extensive preparation, driftwood can still release some tannins, which can slightly lower the pH. Monitor your pH levels and perform regular water changes, especially in the first few weeks after adding new wood.
By following these steps, you can successfully prepare driftwood to sink and create a stunning, natural aquascape for your fish and invertebrates.
How to make driftwood sink in Aquarium tank? share me like one page with images and details share image
Many aquarists enjoy using driftwood in their tanks to create a natural and aesthetically pleasing environment. However, new driftwood tends to float, which can be frustrating. Here’s a comprehensive guide on how to prepare driftwood to sink and safely introduce it into your aquarium.
Why Does Driftwood Float?
Wood floats because it is less dense than water. Freshly collected or purchased driftwood often contains trapped air within its pores and fibers. It also contains tannins, which are organic compounds that can stain aquarium water a yellow or brown color. While tannins are generally harmless and some fish species even benefit from them, many aquarists prefer clear water.
Methods to Make Driftwood Sink
There are several effective methods to prepare driftwood for your aquarium.
1. Soaking (The Most Common Method)
Soaking is the most widely used and effective method, though it requires patience.
Process: Submerge the driftwood completely in a bucket or tub of water. You can use a heavy rock or object to keep it submerged.
Duration: This can take anywhere from a few days to several weeks, or even months for very dense pieces. Change the water every few days to help remove tannins.
Benefits: This method naturally waterlogs the wood, replacing air with water. It also leaches out a significant amount of tannins, reducing their impact on your aquarium water.
Indicator: The wood is ready when it sinks on its own without any assistance.
Here's an example of driftwood soaking in a bucket:
2. Boiling
Boiling accelerates the waterlogging process and offers additional benefits.
Process: Place the driftwood in a large pot and boil it. If the piece is too large, you can boil sections of it.
Duration: Boil for 1-2 hours, changing the water when it turns dark brown.
Benefits:
Faster Sinking: Boiling expels trapped air much faster than soaking.
Tannin Removal: It rapidly leaches out tannins, preventing significant discoloration of your tank water.
Sterilization: Boiling kills off any potential pests, fungi, bacteria, or algae that might be present on the wood, making it safer for your aquarium.
Caution: Ensure the wood is completely cool before placing it in the aquarium.
A piece of driftwood being boiled in a pot:
3. Weighing Down
If you're short on time or have particularly stubborn pieces of wood, you can use weights.
Process: Securely attach a piece of aquarium-safe slate, rock, or a lead plant weight to the bottom of the driftwood using fishing line, cable ties, or aquarium-safe glue.
Benefits: Allows you to place the driftwood in the tank immediately, even if it's not fully waterlogged.
Considerations: Over time, the wood will naturally waterlog, and you may be able to remove the weight. Choose weights that are inconspicuous or can be buried in the substrate.
Driftwood being weighed down by an aquarium-safe rock:
Aquatics
Quality driftwood for your aquarium decoration needs.
New product updates please subscribe below
© 2024. All rights reserved. Design & Developed By Dinesh kumar.
All Driftwood product is crafted entirely from recycled wood sourced responsibly from local stations, ensuring an eco-friendly choice for environmentally conscious consumers
Check out our Instagram page.